How to upload a file into WordPress
Files can be uploaded into the WordPress Dashboard by two separate means.
Direct upload into a page or post
Upload via Media Add New screen
Direct upload into a page or post
One method of uploading files is directly into the page or post. If you have already started creating a page or post, you can upload a file using the WordPress block editor. Blocks are the smallest, most basic unit you’ll use in the editor and can contain anything you’d want to include on a page or post – text, images, videos, audio, buttons, and custom code, to name a few examples.
To upload a file on a page or post using the block editor:
1.On the Dashboard menu, select Pages and then click Add New
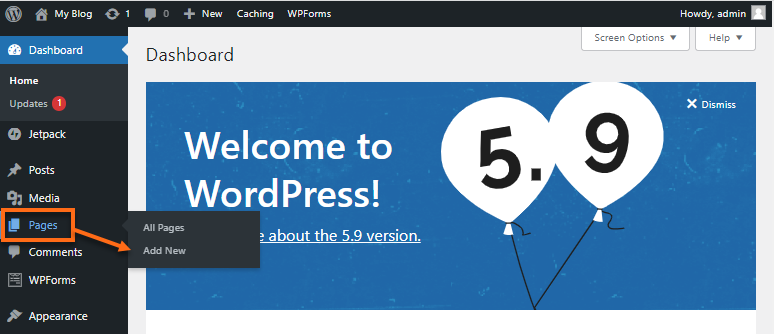
2. On the new page, click the block inserter icon located at the top left or at the workspace area to add a block.

3.Search for the file type you want to upload using the search menu. You can also scroll through the categories until you find the Media section under the Block tab.

4. Select the file type icon from the list (or search results) to add the media block to the page’s workspace area.

5.On the media block (for example, Image block), click Upload to open a dialogue box, where you can select the file you want to upload.

You may also use the Media Library if you have already uploaded a media file to your WordPress Media Library beforehand. To know how to upload files directly to your Media Library, please go to the Upload via the Media Add New screen section below.
6. The Image block should now display the uploaded image. Click the block to show the Image block settings.
7. Once done, click the Save the draft, Preview, or Publish buttons in the top-right section of the page or post.
Upload via Media Add a New screen
With the Media Add New screen, you can upload single or bulk media files (image, video, audio, etc.) into the Media Library and use them later on for your pages or posts. There are two methods for uploading files into the Media Library – the Multi-file uploader and the Browser uploader. The Multi-file uploader is the primary method, but you can click the browser uploader link to upload your files if you’re having issues using this.
To upload a media file(s) using the Multi-file uploader:
1.Log in to your WordPress Dashboard.
2.Select Media from the left menu, then click Add New.

3.In the Upload New Media section, click Select Files to open a dialog box where you can upload multiple files. You can also drag and drop file(s) from your local computer to the upload area.

4.A status bar will be displayed next to each file to indicate the upload progress.
5.Once completely uploaded, the file’s thumbnail and details will be displayed. You can click the Copy URL to clipboard to copy the file’s URL or Edit to edit and save information about the uploaded file.

6.The file(s) are now stored in the Media Library section.
